Contents:
- Why Professional Results Are Within Your Reach
- Preparation: The Foundation of Success
- Assess Your Hair’s Current Condition
- Choose the Right Shade for Your Skin Tone
- Do a Patch Test (Non-Negotiable)
- How to Colour Your Hair at Home Like a Professional: Step-by-Step Process
- Gather Your Tools and Materials
- Protect Your Hairline and Skin
- Section Your Hair Properly
- Mix Your Colour Correctly
- Apply Colour Section by Section
- Regional Approaches: What Works Where You Live
- Rinsing, Conditioning, and Aftercare
- Rinse Properly
- Use the Conditioning Treatment
- Post-Colour Hair Care
- Troubleshooting Common Problems
- Patchy or Uneven Colour
- Colour Darker Than Expected
- Colour Fades Quickly
- Frequently Asked Questions
- How Often Can I Colour My Hair at Home Safely?
- Can I Lighten My Hair at Home?
- Is It Safe to Colour Damaged or Previously Coloured Hair?
- What’s the Difference Between Semi-Permanent and Permanent Colour?
- How Do I Blend Home Colour with Salon Colour?
- Your Next Steps
Most people believe that professional-looking hair colour can only come from sitting in a salon chair for three hours. That’s simply not true. The reality is that you can achieve genuinely impressive results at home if you understand a few key principles and invest in the right products. This guide will walk you through exactly how to colour your hair at home like a professional, whether you’re refreshing your roots or going for a complete transformation.
Why Professional Results Are Within Your Reach
The gap between home colouring and salon colouring has narrowed dramatically over the past five years. Professional colorists rely on understanding your hair type, choosing the right formula, and applying colour with precision. These aren’t mysterious skills—they’re learnable techniques that anyone can master at home.
The advantage salons have isn’t always superior products; it’s experience and access to colour formulas in bulk. Today’s home colouring kits contain high-quality ingredients comparable to professional lines, with some ranging from £15 to £40 depending on brand and complexity. The real difference lies in application technique and preparation.
Margaret Chen, a certified trichologist at the London Institute of Hair Science, explains: “The most common mistake people make at home is not sectioning their hair properly before application. Professionals section hair into four to six zones depending on density. This ensures even colour distribution and prevents patchy results.”
Preparation: The Foundation of Success
Assess Your Hair’s Current Condition
Before you even think about opening a dye box, examine your hair honestly. Is it healthy, damaged, or somewhere in between? Run a section between your fingers. Does it feel rough or silky? Damaged or over-processed hair absorbs colour differently and may require a conditioning treatment beforehand.
If your hair shows signs of severe damage—excessive breakage, split ends beyond two centimetres, or a straw-like texture—delay colouring for at least two weeks. Apply a deep conditioning mask twice weekly during this period. Healthy hair holds colour better and displays it more vibrantly.
Choose the Right Shade for Your Skin Tone
Professionals use undertone analysis before suggesting a shade. Look at the veins on your wrist under natural light. If they appear greenish, you likely have warm undertones. Blue or purple veins suggest cool undertones. Neutral undertones show a mix of both.
- Warm undertones: Golden, copper, warm brown, and caramel shades complement you best
- Cool undertones: Ash, platinum, cool brown, and burgundy shades suit you better
- Neutral undertones: Most shades work, but test first anyway
This matters because a shade that looks stunning on a friend with cool undertones may look muddy on you with warm undertones. Always purchase the shade based on your undertone analysis, not just because it looks nice in the picture.
Do a Patch Test (Non-Negotiable)
Patch testing isn’t excessive caution—it’s essential. Apply a small amount of mixed colour behind your ear or on your inner elbow 24 hours before full application. This identifies allergic reactions to PPD (paraphenylenediamine) or other ingredients. Roughly 2-3% of people experience sensitivity, and discovering this during full-head application is a disaster.
How to Colour Your Hair at Home Like a Professional: Step-by-Step Process
Gather Your Tools and Materials
Professionals use specific tools for a reason. Assemble these items before you begin:
- Sectioning clips (at least four, available for £3-8)
- An applicator bottle or tint brush (usually included in kits)
- Old towels you don’t mind staining
- Petroleum jelly or coconut oil for hairline protection
- Disposable gloves (latex or nitrile)
- Mixing bowl (ceramic or plastic, not metal)
- A mirror and ideally a second mirror for checking the back
- A timer or smartphone clock
Metal bowls react with some colour formulas and affect the final result. This is why professionals use ceramic or plastic exclusively.
Protect Your Hairline and Skin
Apply a thick barrier of petroleum jelly or coconut oil along your hairline, ears, and neck. This prevents unwanted staining on your skin. Use it generously—you want a visible line. Professionals apply this with precision because colour stains are stubborn. Spending 90 seconds here saves hours of scrubbing later.
Section Your Hair Properly
This is where amateurs diverge from professionals. Don’t just pick up a brush and start painting. Divide your hair into four main sections using clips:
- Part your hair down the middle from forehead to nape
- Create another horizontal part from ear to ear across the crown
- Clip each of the four sections separately
If you have very thick hair or natural texture, create six sections instead. This method ensures every strand receives colour and prevents the back sections from looking darker because they’ve been sitting in colour longer.
Mix Your Colour Correctly
Read the instructions three times before mixing. Some formulas require a 1:1 ratio; others use different ratios. Using the wrong ratio compromises colour deposit and longevity. Mix until you have a smooth, lump-free consistency—typically 1-2 minutes of stirring. If the mixture is too thick, colour won’t distribute evenly. If it’s too thin, it won’t deposit properly.
Work quickly once mixed. Most colour formulas remain effective for only 30 minutes after mixing. Setting up your workspace before mixing ensures you’re not hunting for clips while your colour loses potency.
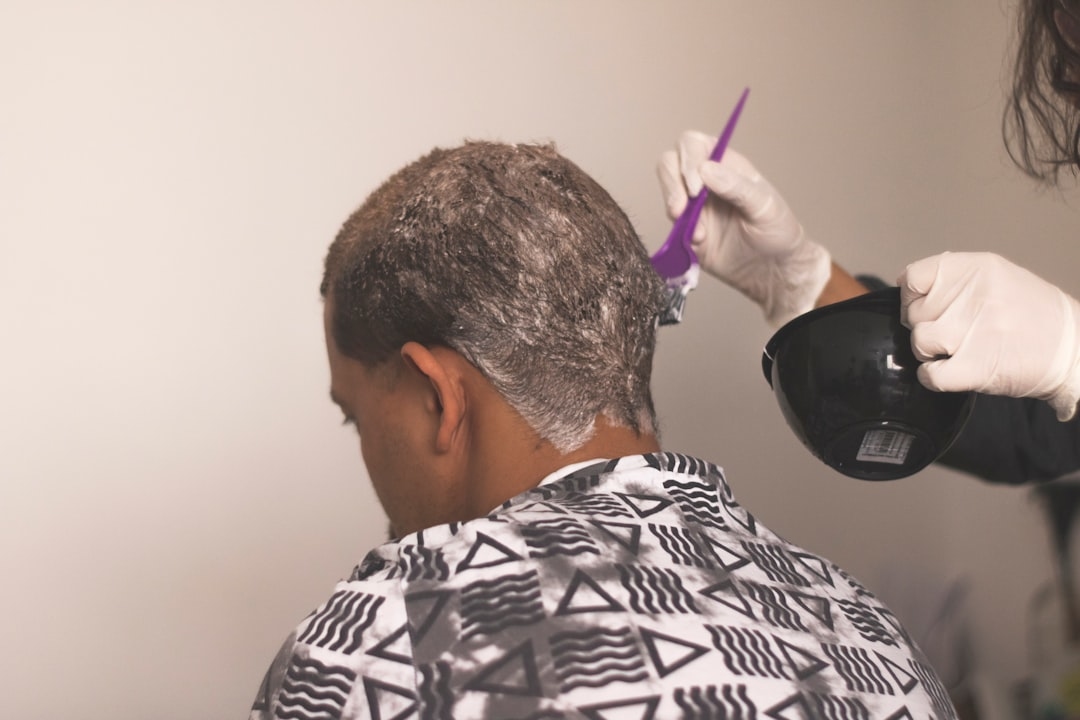
Apply Colour Section by Section
Start with the section that’s hardest to reach or where you need the most coverage—typically the back sections. Unclip one section and subdivide it into smaller subsections about one centimetre wide. Using your applicator bottle or brush, apply colour to the roots first, then work the colour through the mid-lengths and ends.
The roots need colour longest because they’re the newest growth and resist colour the most. Many professionals apply colour to roots first, then distribute it to the rest of the hair during the last five minutes of processing time. This technique prevents the ends from becoming over-processed and darker than roots.
Check your watch. Most permanent colour requires 35-45 minutes of processing time. Semi-permanent colour needs 20-30 minutes. Follow your kit’s instructions precisely.
Regional Approaches: What Works Where You Live
Water hardness varies significantly across the UK, affecting colour results. In the South, particularly London and the Southeast, water is very hard due to high mineral content. Hard water can deposit minerals on the hair shaft, creating a dull coating over the colour. Professionals in London often recommend a chelating shampoo once weekly to strip these deposits.

In the North and Scotland, water tends to be softer, meaning colour often appears brighter and lusher without chelating treatments. Meanwhile, coastal areas like Cornwall experience salt spray that oxidises colour, making it fade faster. If you live near the coast, consider protective products with UV filters.
Understanding your local water chemistry helps you protect your investment. A water softener device (£30-80) attached to your shower can extend colour vibrancy by 15-20% in hard water areas.
Rinsing, Conditioning, and Aftercare
Rinse Properly
When the timer sounds, rinse thoroughly with cool water. Use cool water, not hot, because heat opens the hair cuticle and allows colour molecules to escape. Rinse for at least two minutes until the water runs completely clear. If you skip this step, leftover colour molecules continue processing and can turn darker than intended.
Use the Conditioning Treatment
Your colour kit includes a conditioning treatment for a reason. Apply it generously for 5-10 minutes. This closes the hair cuticle and locks colour inside. Professional colorists always include this step because it affects colour longevity by up to 30%.
Post-Colour Hair Care
After colouring, your hair needs extra attention for at least two weeks. Wash in cool water with colour-safe shampoo. Skip regular shampoo—its surfactants strip colour molecules from the hair shaft. Expect to spend £8-12 on a quality colour-safe shampoo, which will preserve your colour investment worth £20-40.
Apply a deep conditioning mask twice weekly for the first month. This strengthens the hair cuticle and extends colour vibrancy. Chlorine in swimming pools oxidises colour rapidly, so wet your hair with fresh water and apply leave-in conditioner before swimming to prevent absorption of chlorinated water.
Troubleshooting Common Problems
Patchy or Uneven Colour
This usually means sectioning was insufficient or colour wasn’t distributed evenly. For your next application, create smaller subsections and ensure every strand receives product. Take progress photos under natural light during application so you can spot missed areas before time runs out.
Colour Darker Than Expected
This happens when colour processes longer than recommended or when previous colours have built up on the hair shaft. For the next application, check processing time at the 30-minute mark (if the timer says 45 minutes). If colour looks close to final shade at 30 minutes, rinse early rather than wait the full time.
Colour Fades Quickly
Fading within two weeks suggests insufficient processing time or inadequate conditioning. Next time, follow the processing time precisely. Also examine your post-colour routine—are you using colour-safe products? Switching to regular shampoo can cause 20-30% faster fading.
Frequently Asked Questions
How Often Can I Colour My Hair at Home Safely?
Permanent colour can be applied every 4-6 weeks, focusing on roots only. Full-head colour should be done no more frequently than every 8-10 weeks. Colouring more often than this risks chemical damage. If you colour every 4 weeks, only apply colour to new growth (typically the first two centimetres at the root), not previously coloured hair.
Can I Lighten My Hair at Home?
Lightening is riskier than darkening because it requires higher processing times and stronger formulas. If you’re going more than two shades lighter, a salon visit is genuinely safer. If you’re lightening just one shade, use quality powder bleach (£8-15) and follow processing times exactly. Overprocessing lightened hair causes breakage that’s irreversible.
Is It Safe to Colour Damaged or Previously Coloured Hair?
Yes, but with precautions. Damaged hair requires a strand test first. Process colour for 5-10 minutes less than the instructions recommend, as damaged hair absorbs colour faster. Apply a protective treatment to the ends before colouring. If your hair is severely damaged, use a semi-permanent colour (which lasts 4-6 weeks) instead of permanent colour, as it’s gentler.
What’s the Difference Between Semi-Permanent and Permanent Colour?
Permanent colour contains ammonia and lifts the hair cuticle permanently, altering the hair shaft itself. It lasts until new growth appears (typically 4-6 weeks before roots show). Semi-permanent colour coats the outside of the hair without opening the cuticle. It fades gradually over 4-6 weeks and is gentler on damaged hair. Semi-permanent is better if you’re hesitant or have compromised hair health.
How Do I Blend Home Colour with Salon Colour?
If you’ve had professional colour and want to touch up at home, match the exact shade and brand your stylist used. Apply home colour only to new growth, not to the previously coloured hair. Processing times should remain the same. If you’re unsure which shade was used, ask your stylist or book a consultation before buying home colour—a £25 consultation prevents a £60 corrective colour later.
Your Next Steps
You now understand the techniques that professionals use and how to adapt them for your home. The difference between a mediocre home colour job and a professional-looking result doesn’t require expensive products or mystical knowledge—it requires proper sectioning, correct processing time, and appropriate aftercare. Start with a shade close to your natural colour if this is your first time. As you build confidence, you can experiment with bolder shifts. Keep notes on processing times and results; this information becomes invaluable as you refine your technique. The next time you’re tempted to book an expensive salon appointment, remember that you have the skills and knowledge to achieve salon-quality results yourself.
+ There are no comments
Add yours